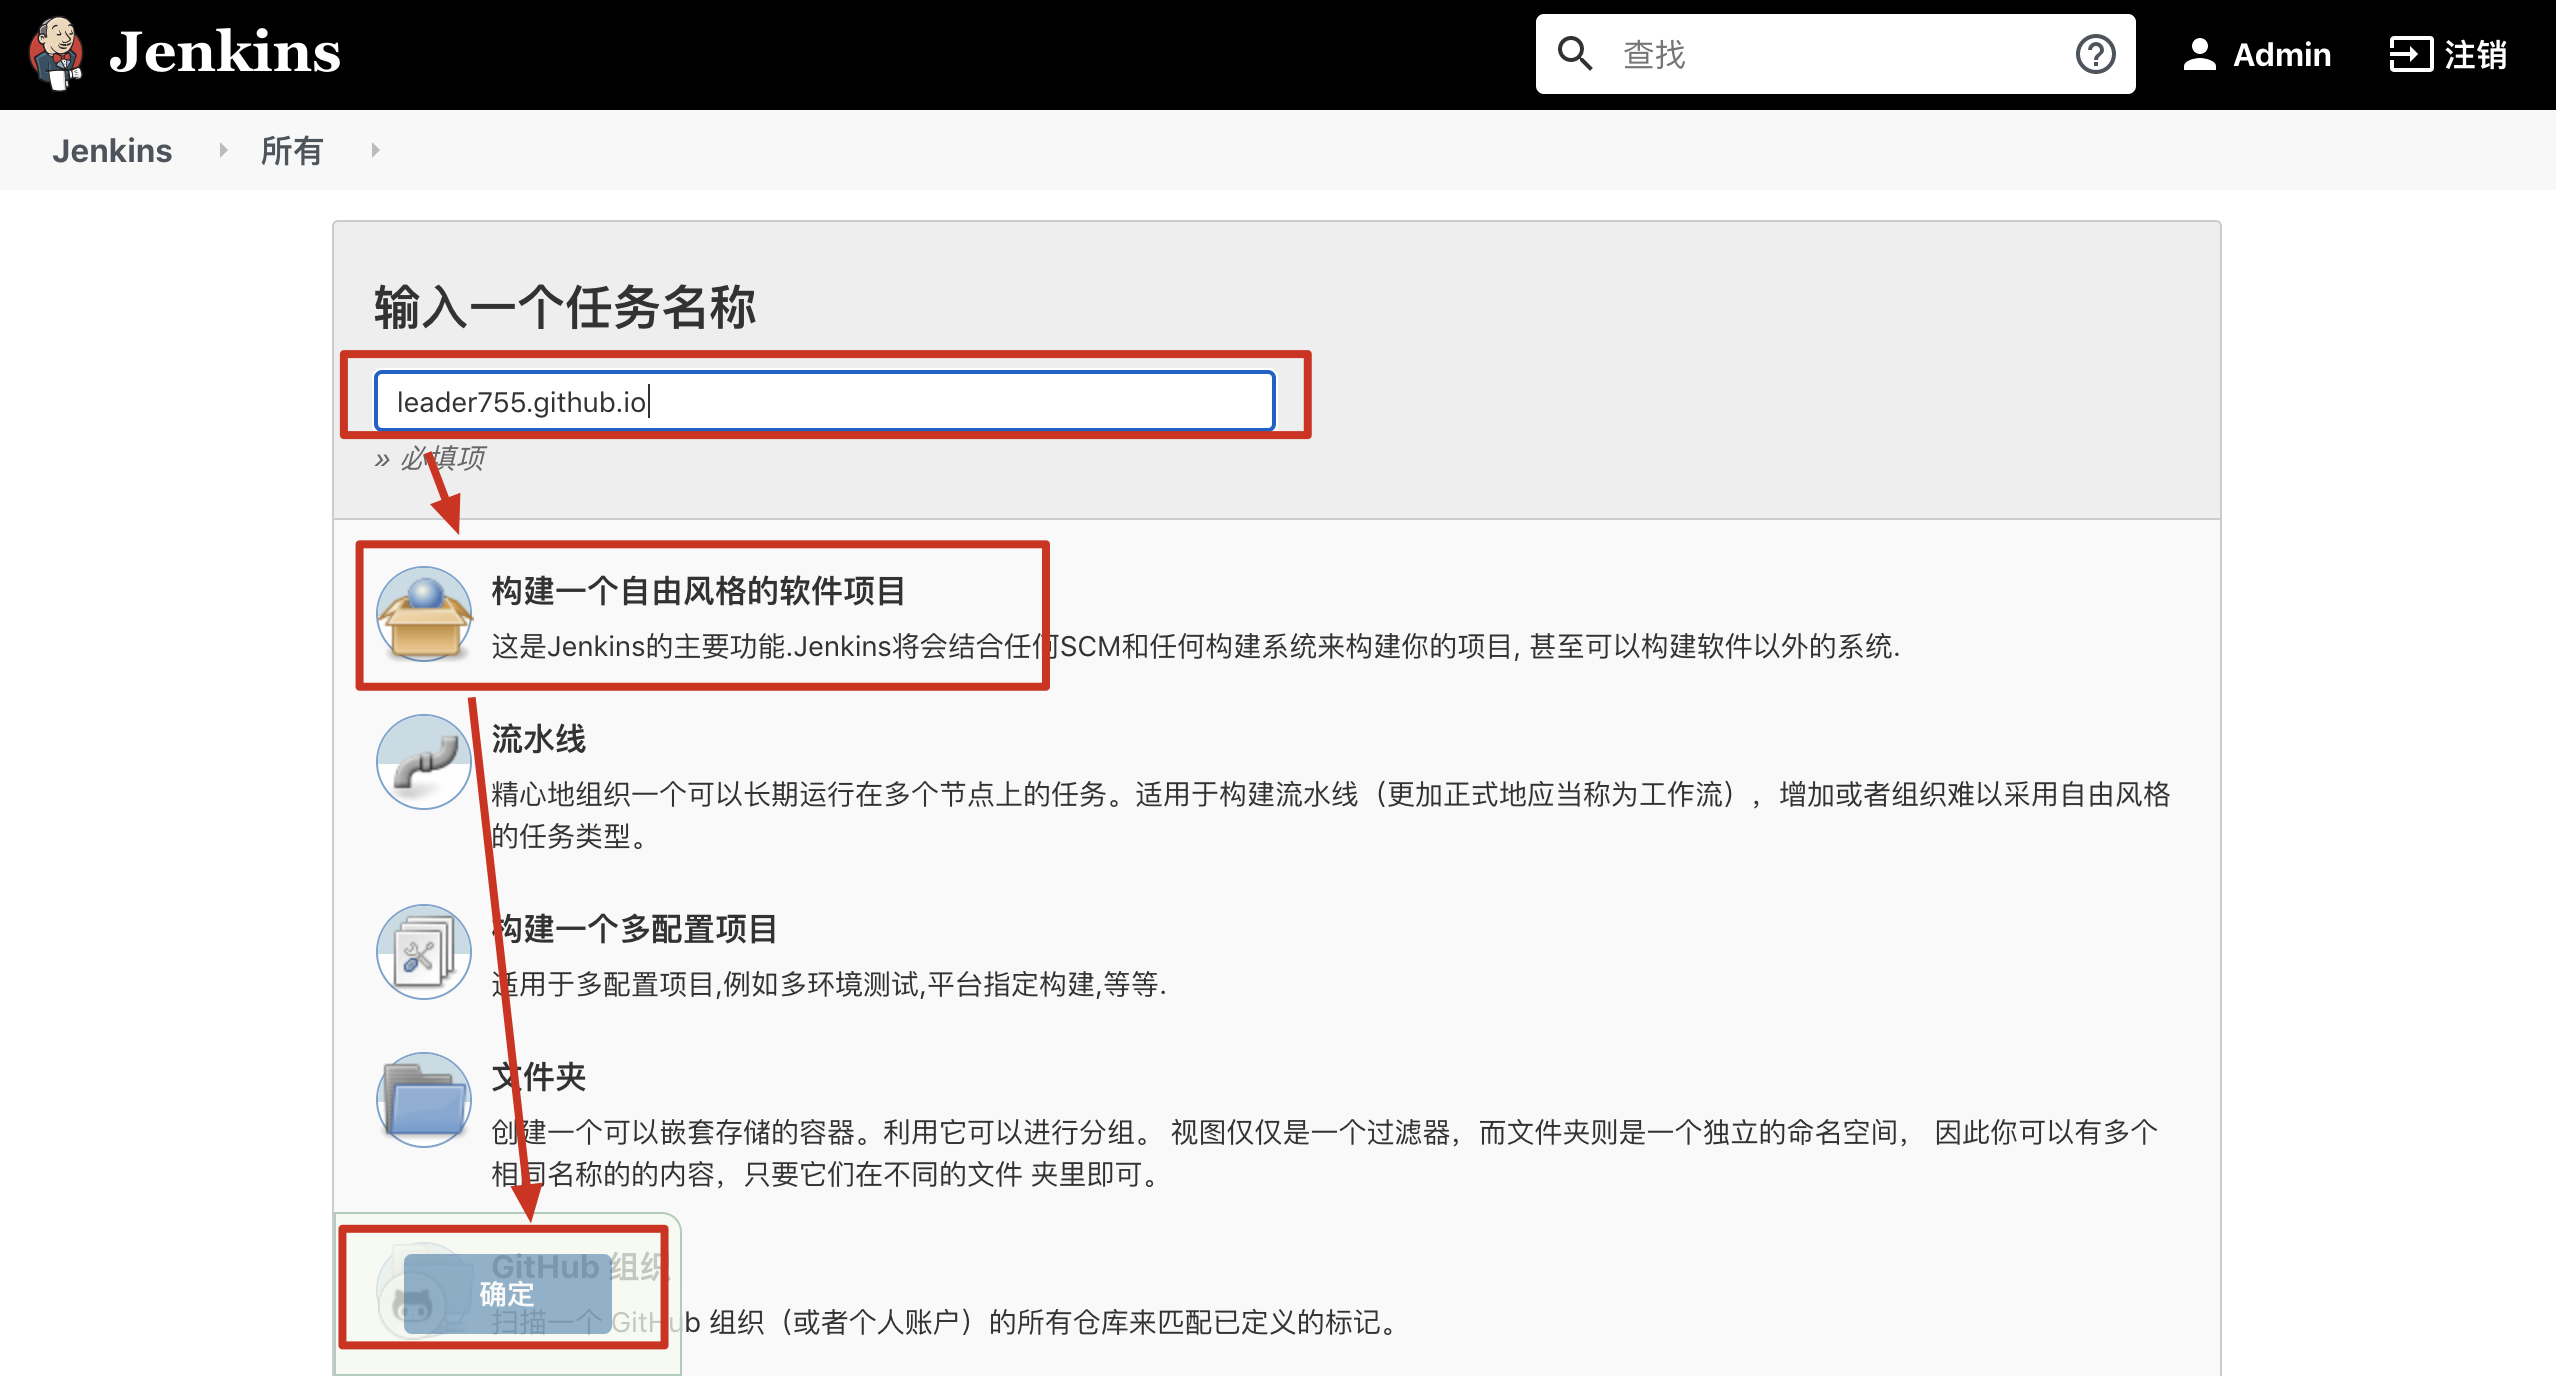
1>创建项目
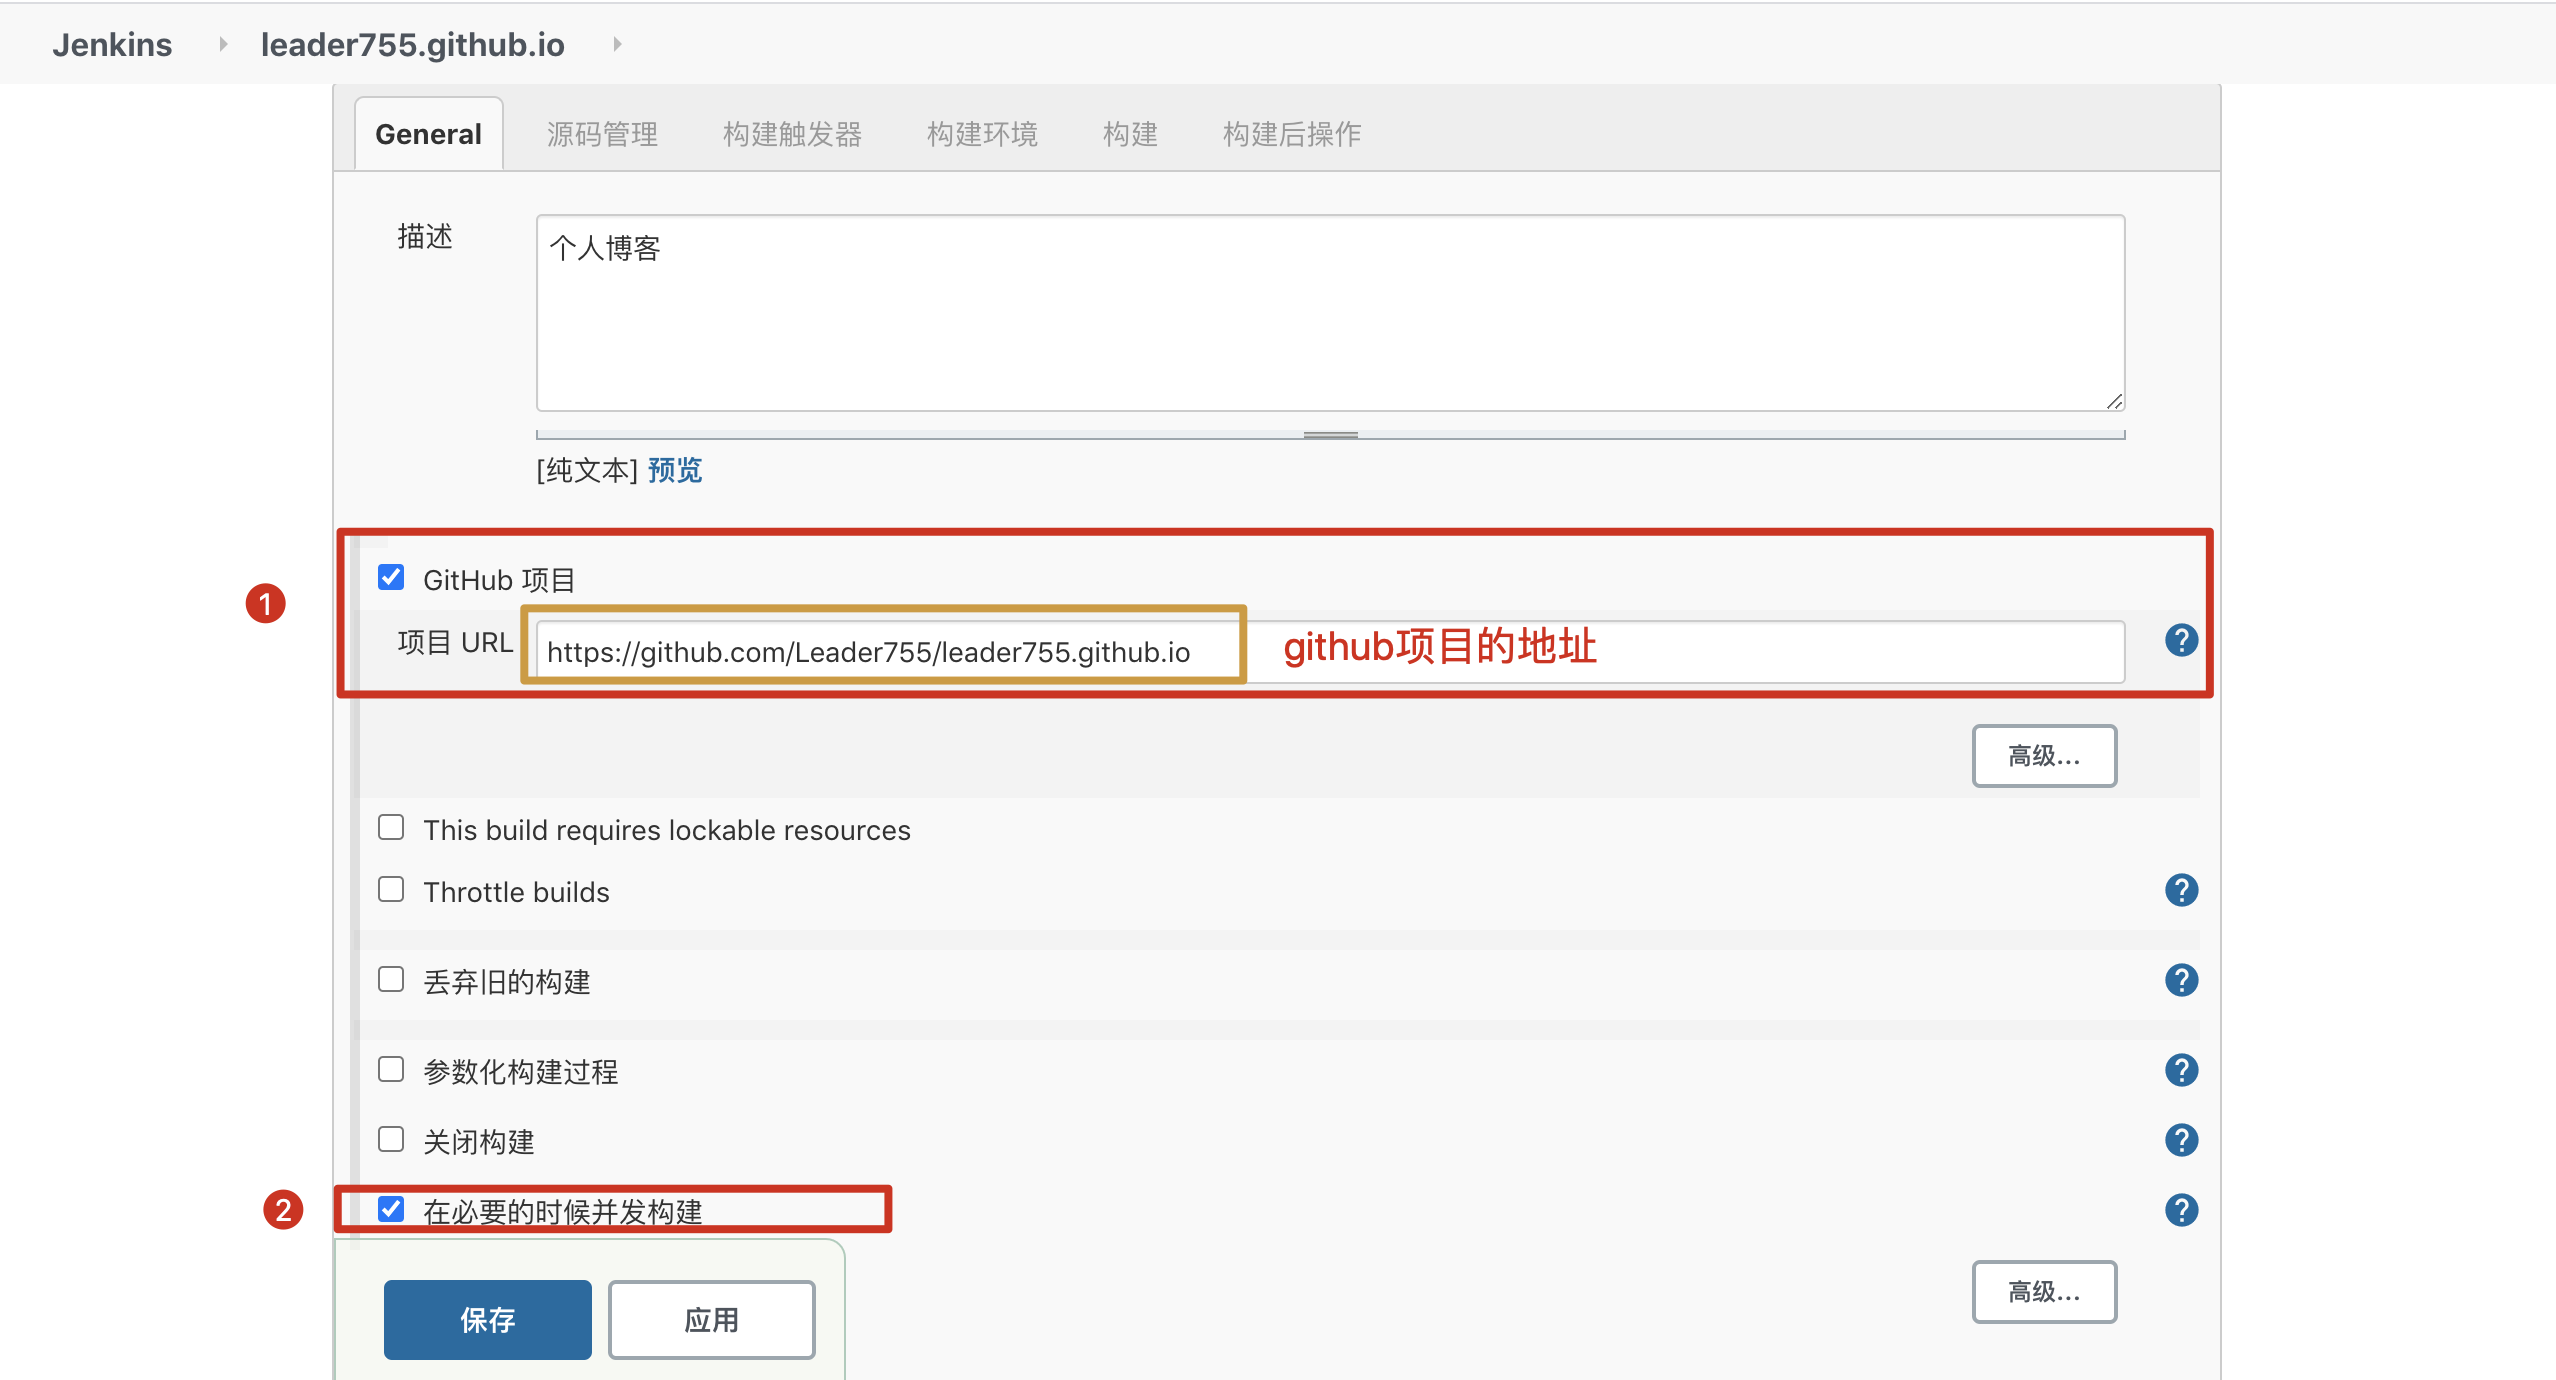
2>General 设置
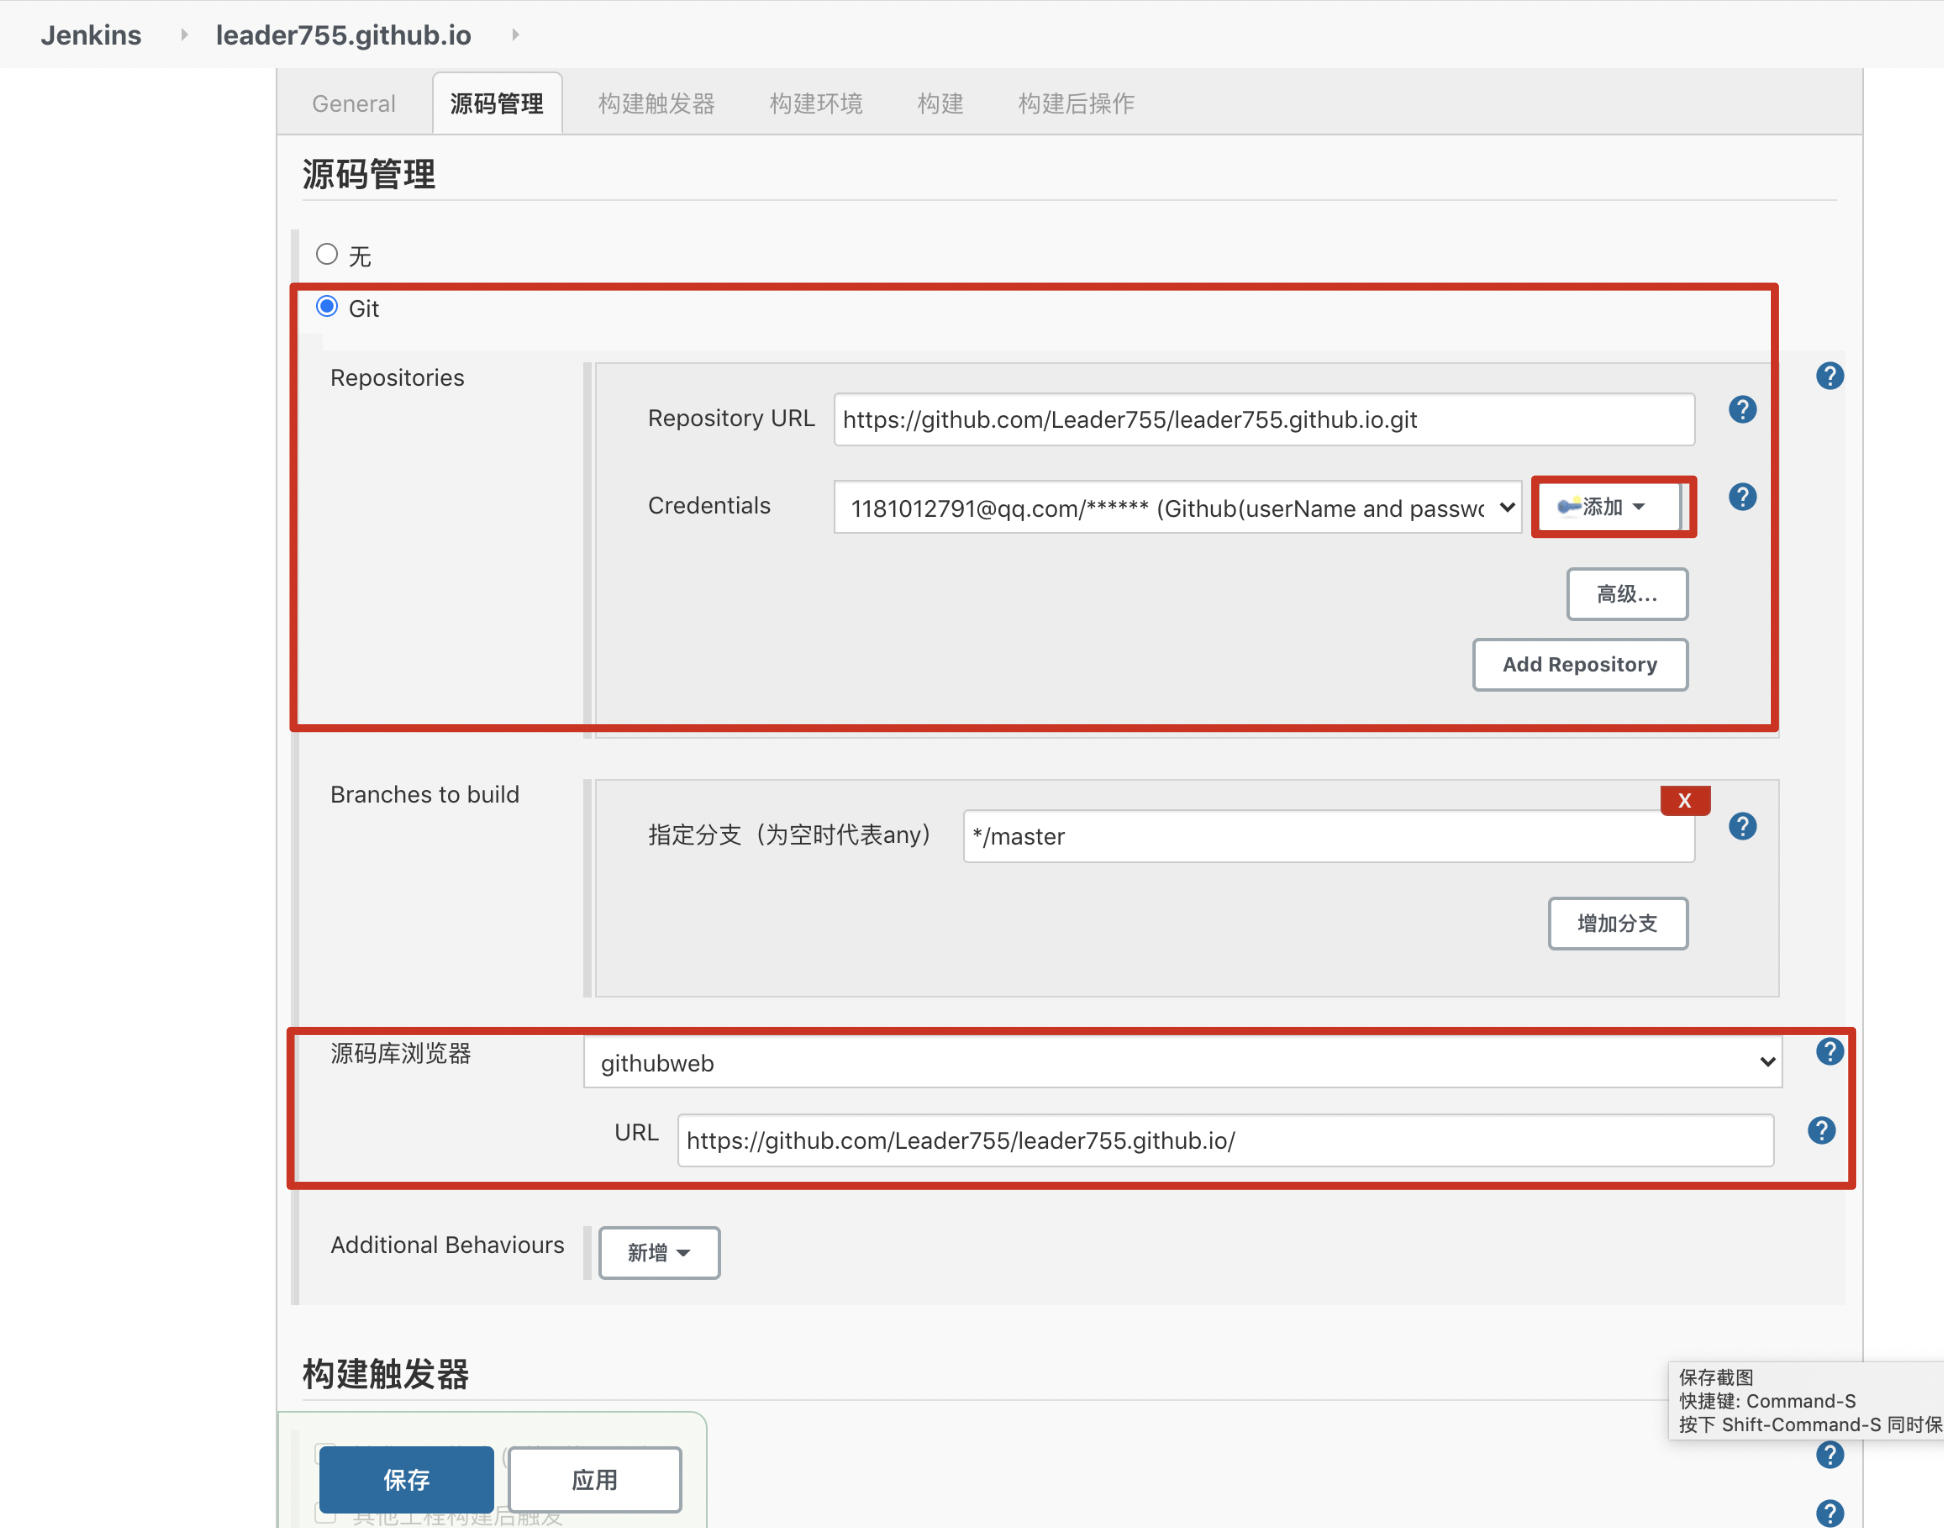
3>配置源码管理
1>勾选Git选项之后,就会出现相关的填写项,根据下图的指引来填写就行了
- 填写项目的 git 地址, eg: https://github.com/Leader755/leader755.github.io.git
- 添加 github 用户和密码(要是一个有写权限的 github 账号,此步骤见下图)
- 选择 githubweb 源码库浏览器,并填上你的项目 URL,这样每次构建都会生成对应的 changes,可直接链到 github 上看变更详情
2>点击添加增加 Credentials: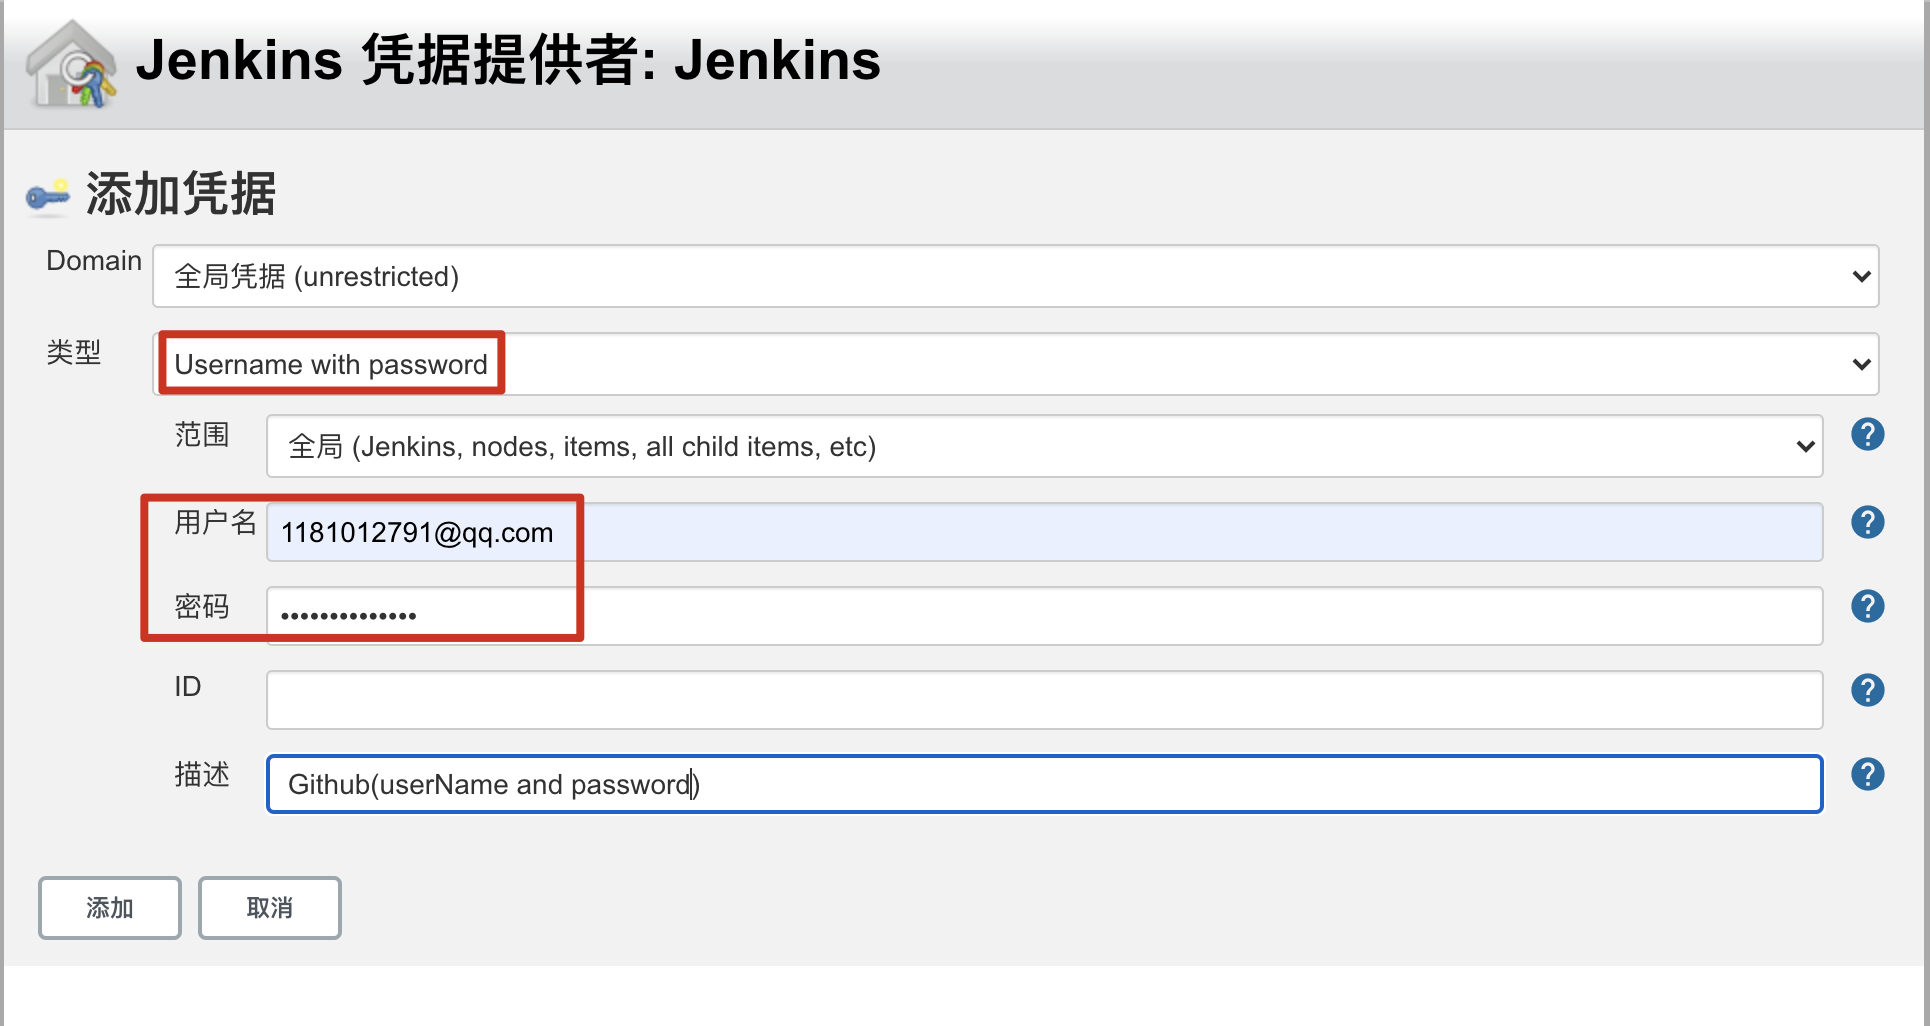
4>构建触发器
勾选 GitHub hook trigger for GITScm polling 即可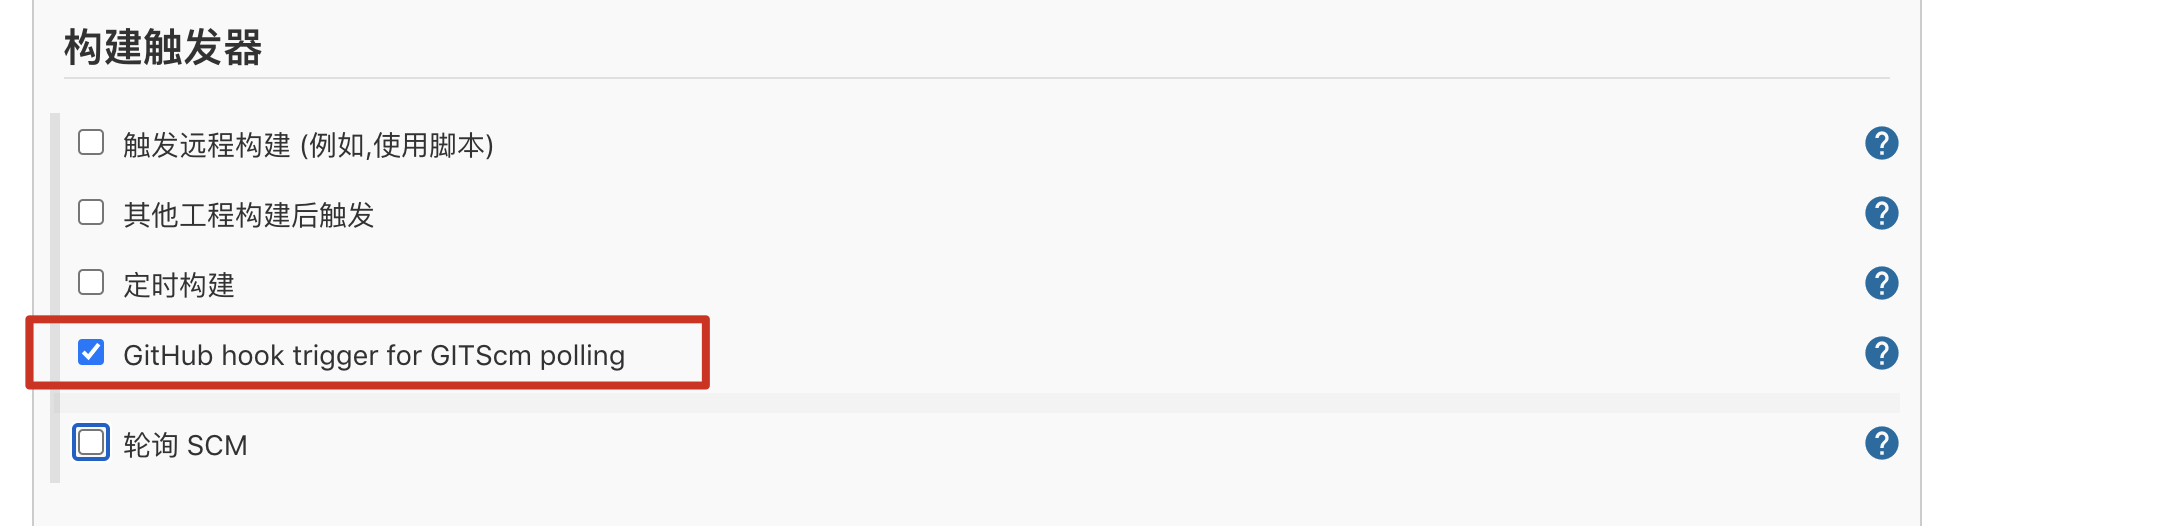
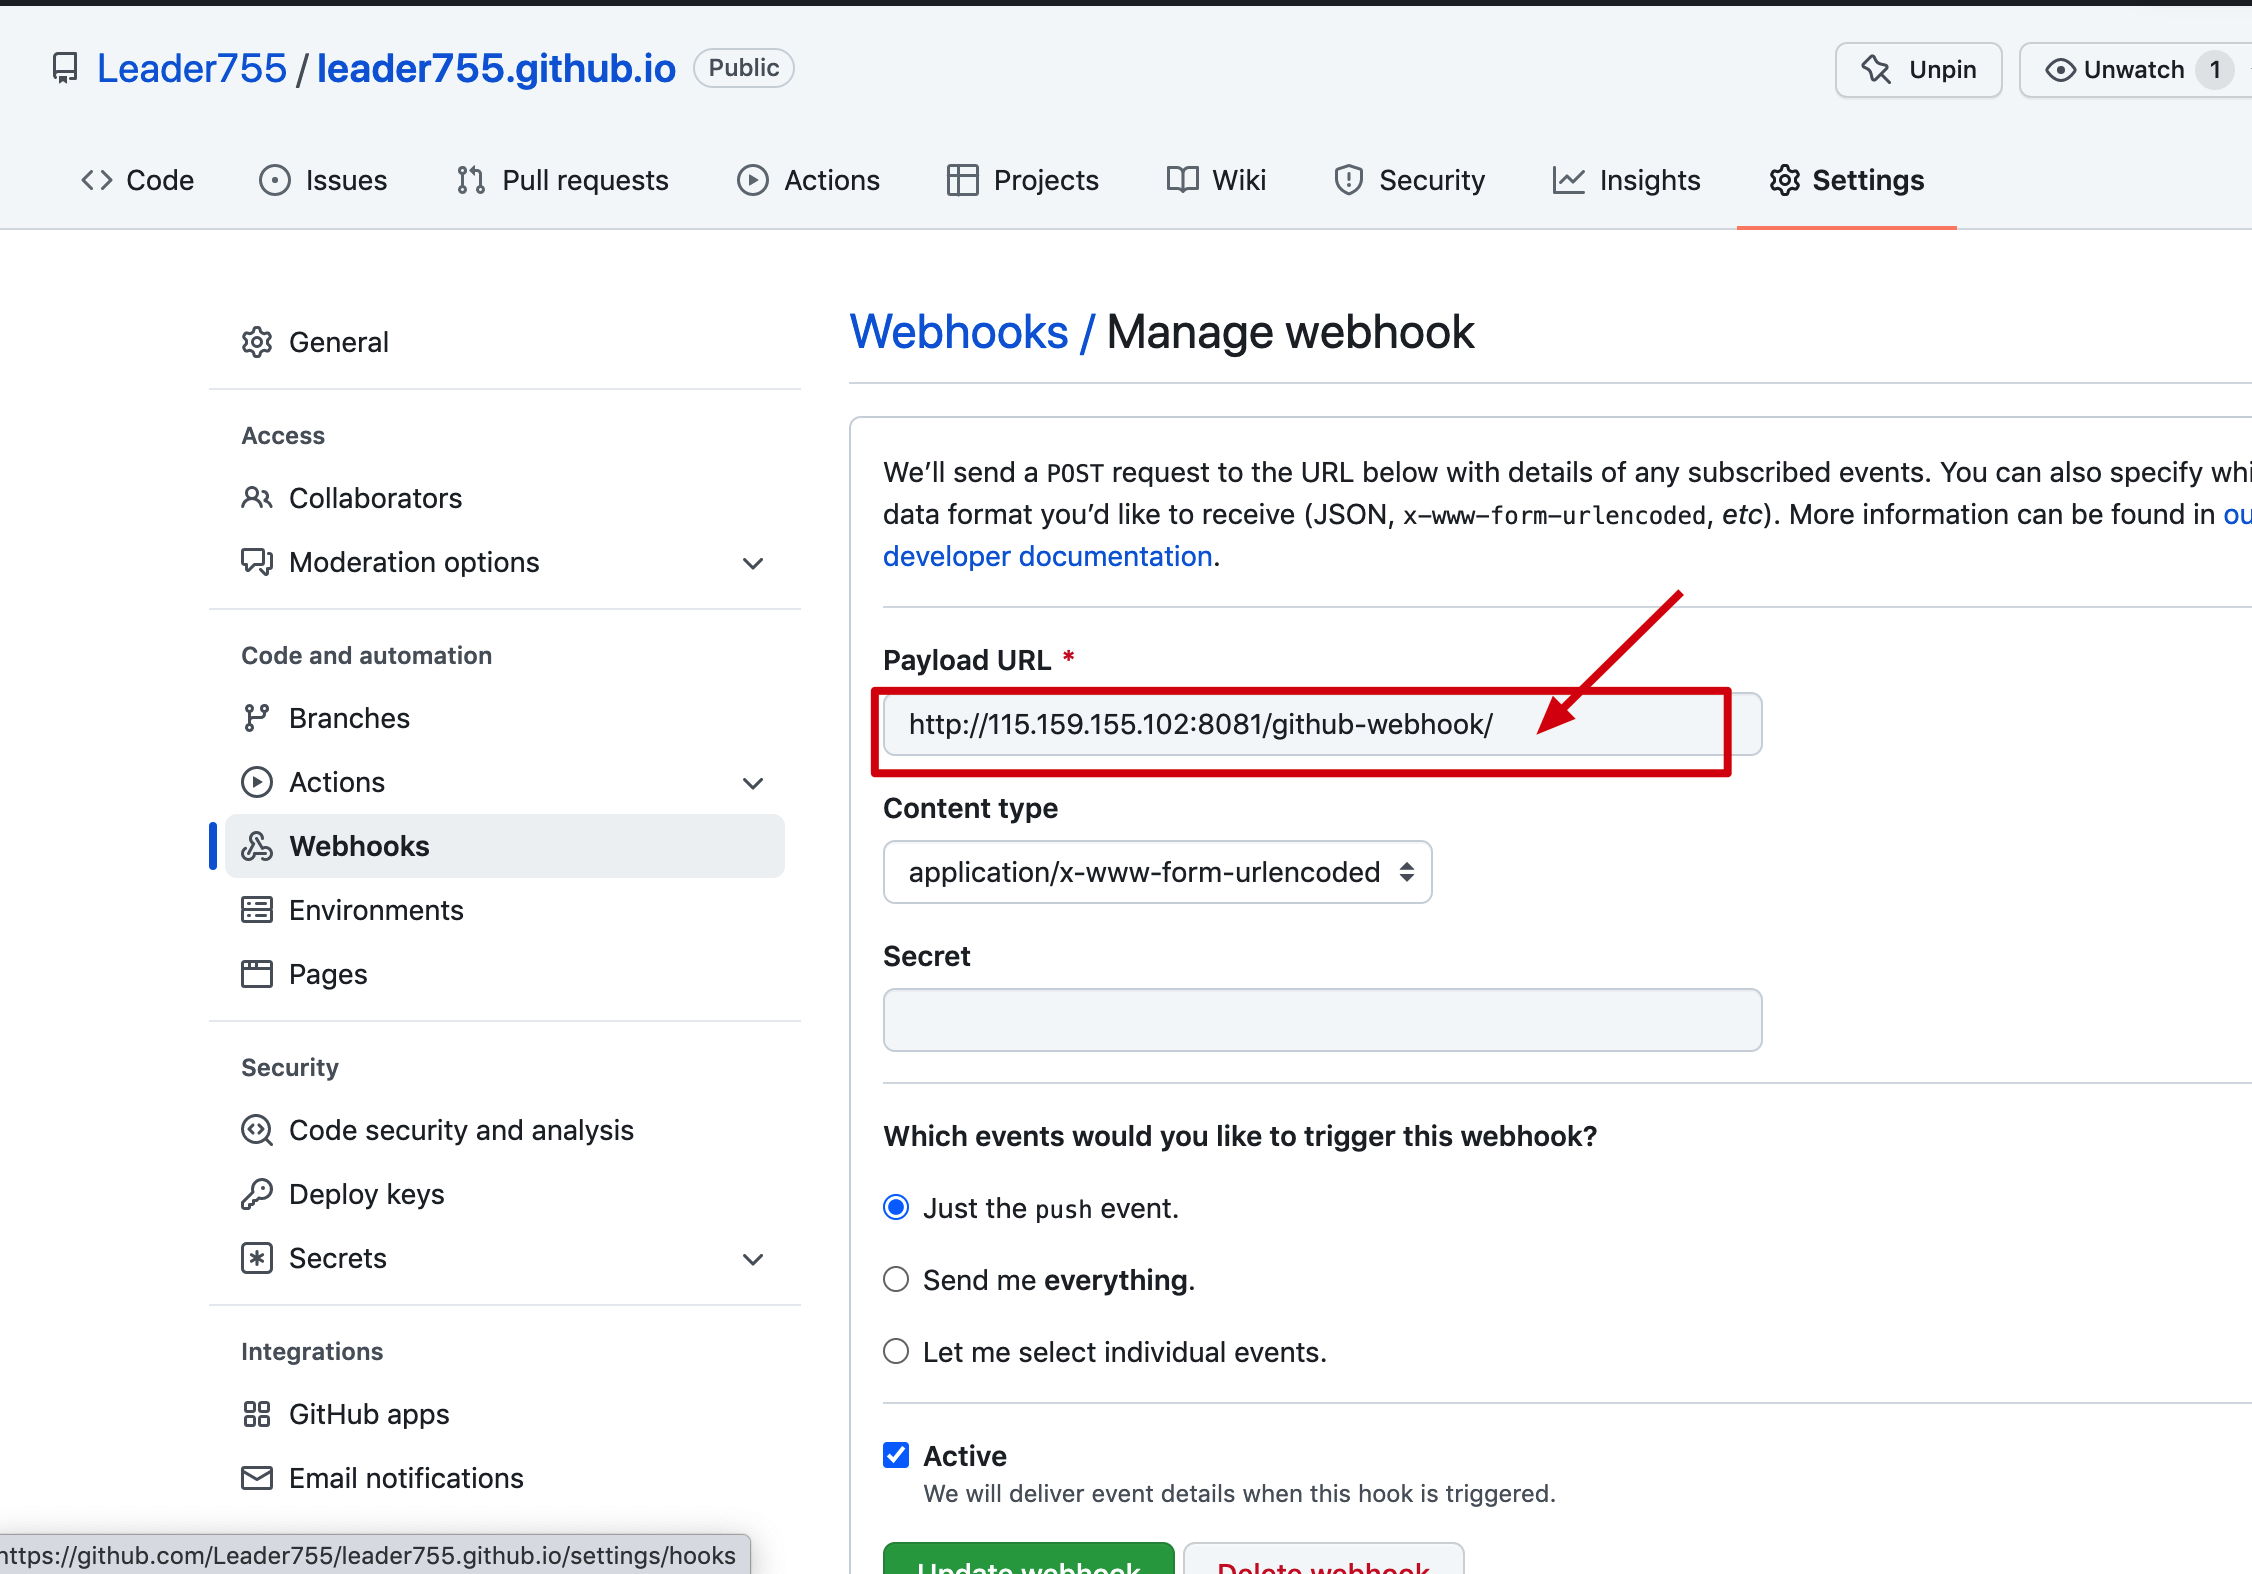
5>github 设置代码变动自动触发构建
- github 设置 GitHub webhooks(具体需要持续集成的项目),新建或者设置现有项目的 webhooks 选项,url:部署的服务器的 IP + 端口 + github-webhook
##
5>构建环境配置
勾选 Use secret test(s) or file(s),
选择绑定 –> 点击新增按钮 –> 选择 Secret text –> 下拉选择,添加 secret token –> 之后应用
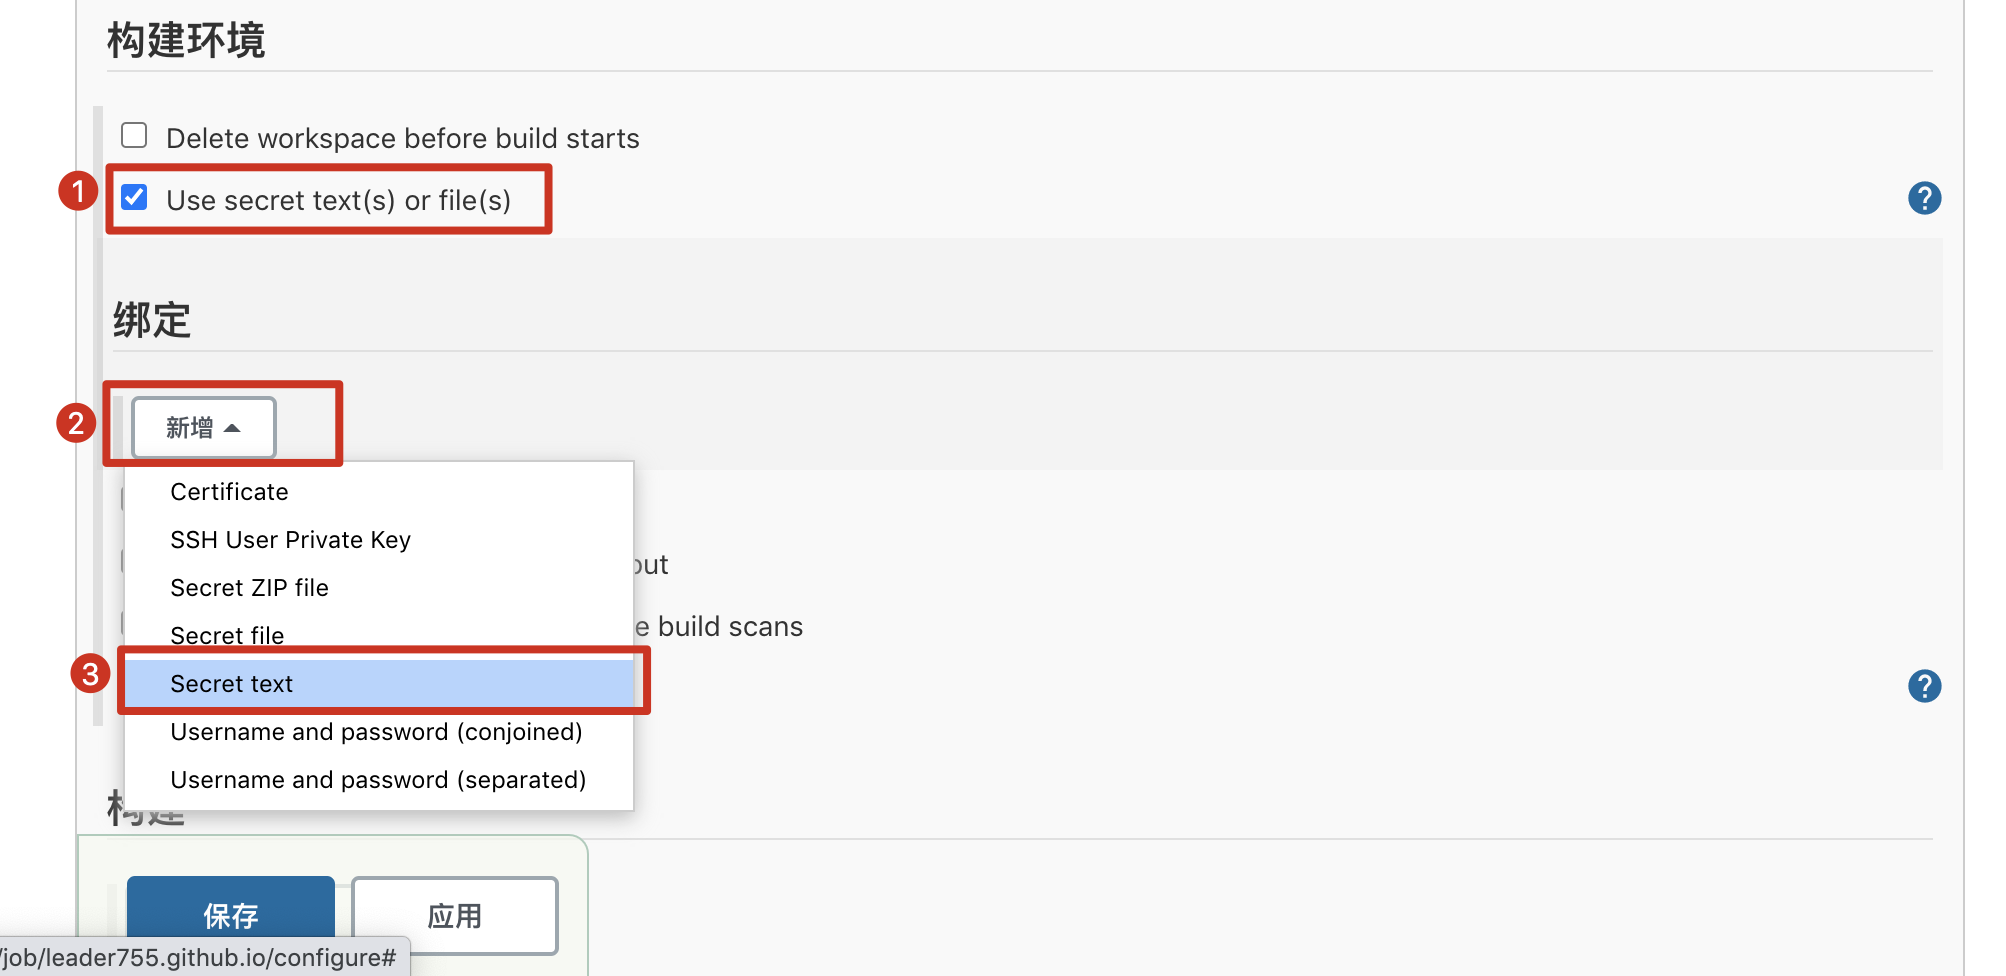
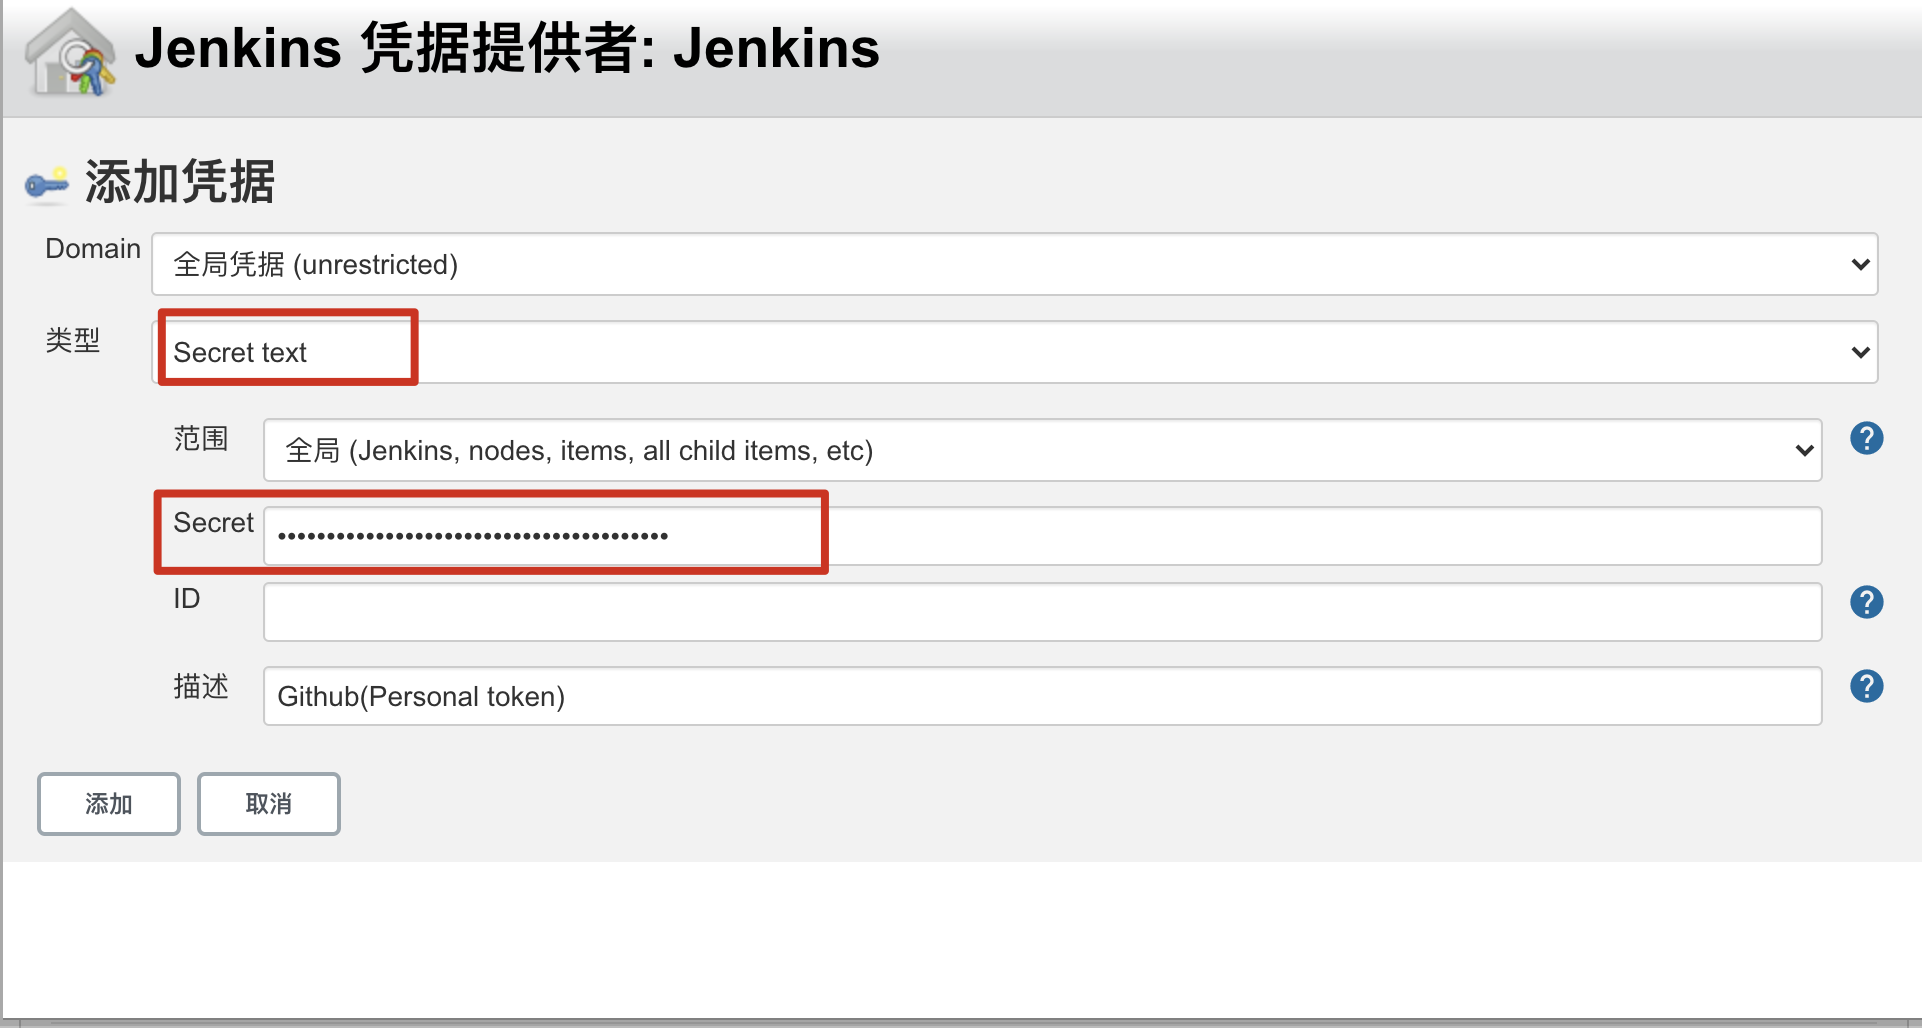
去 github 创建 access token ,将其值填入 secret 中。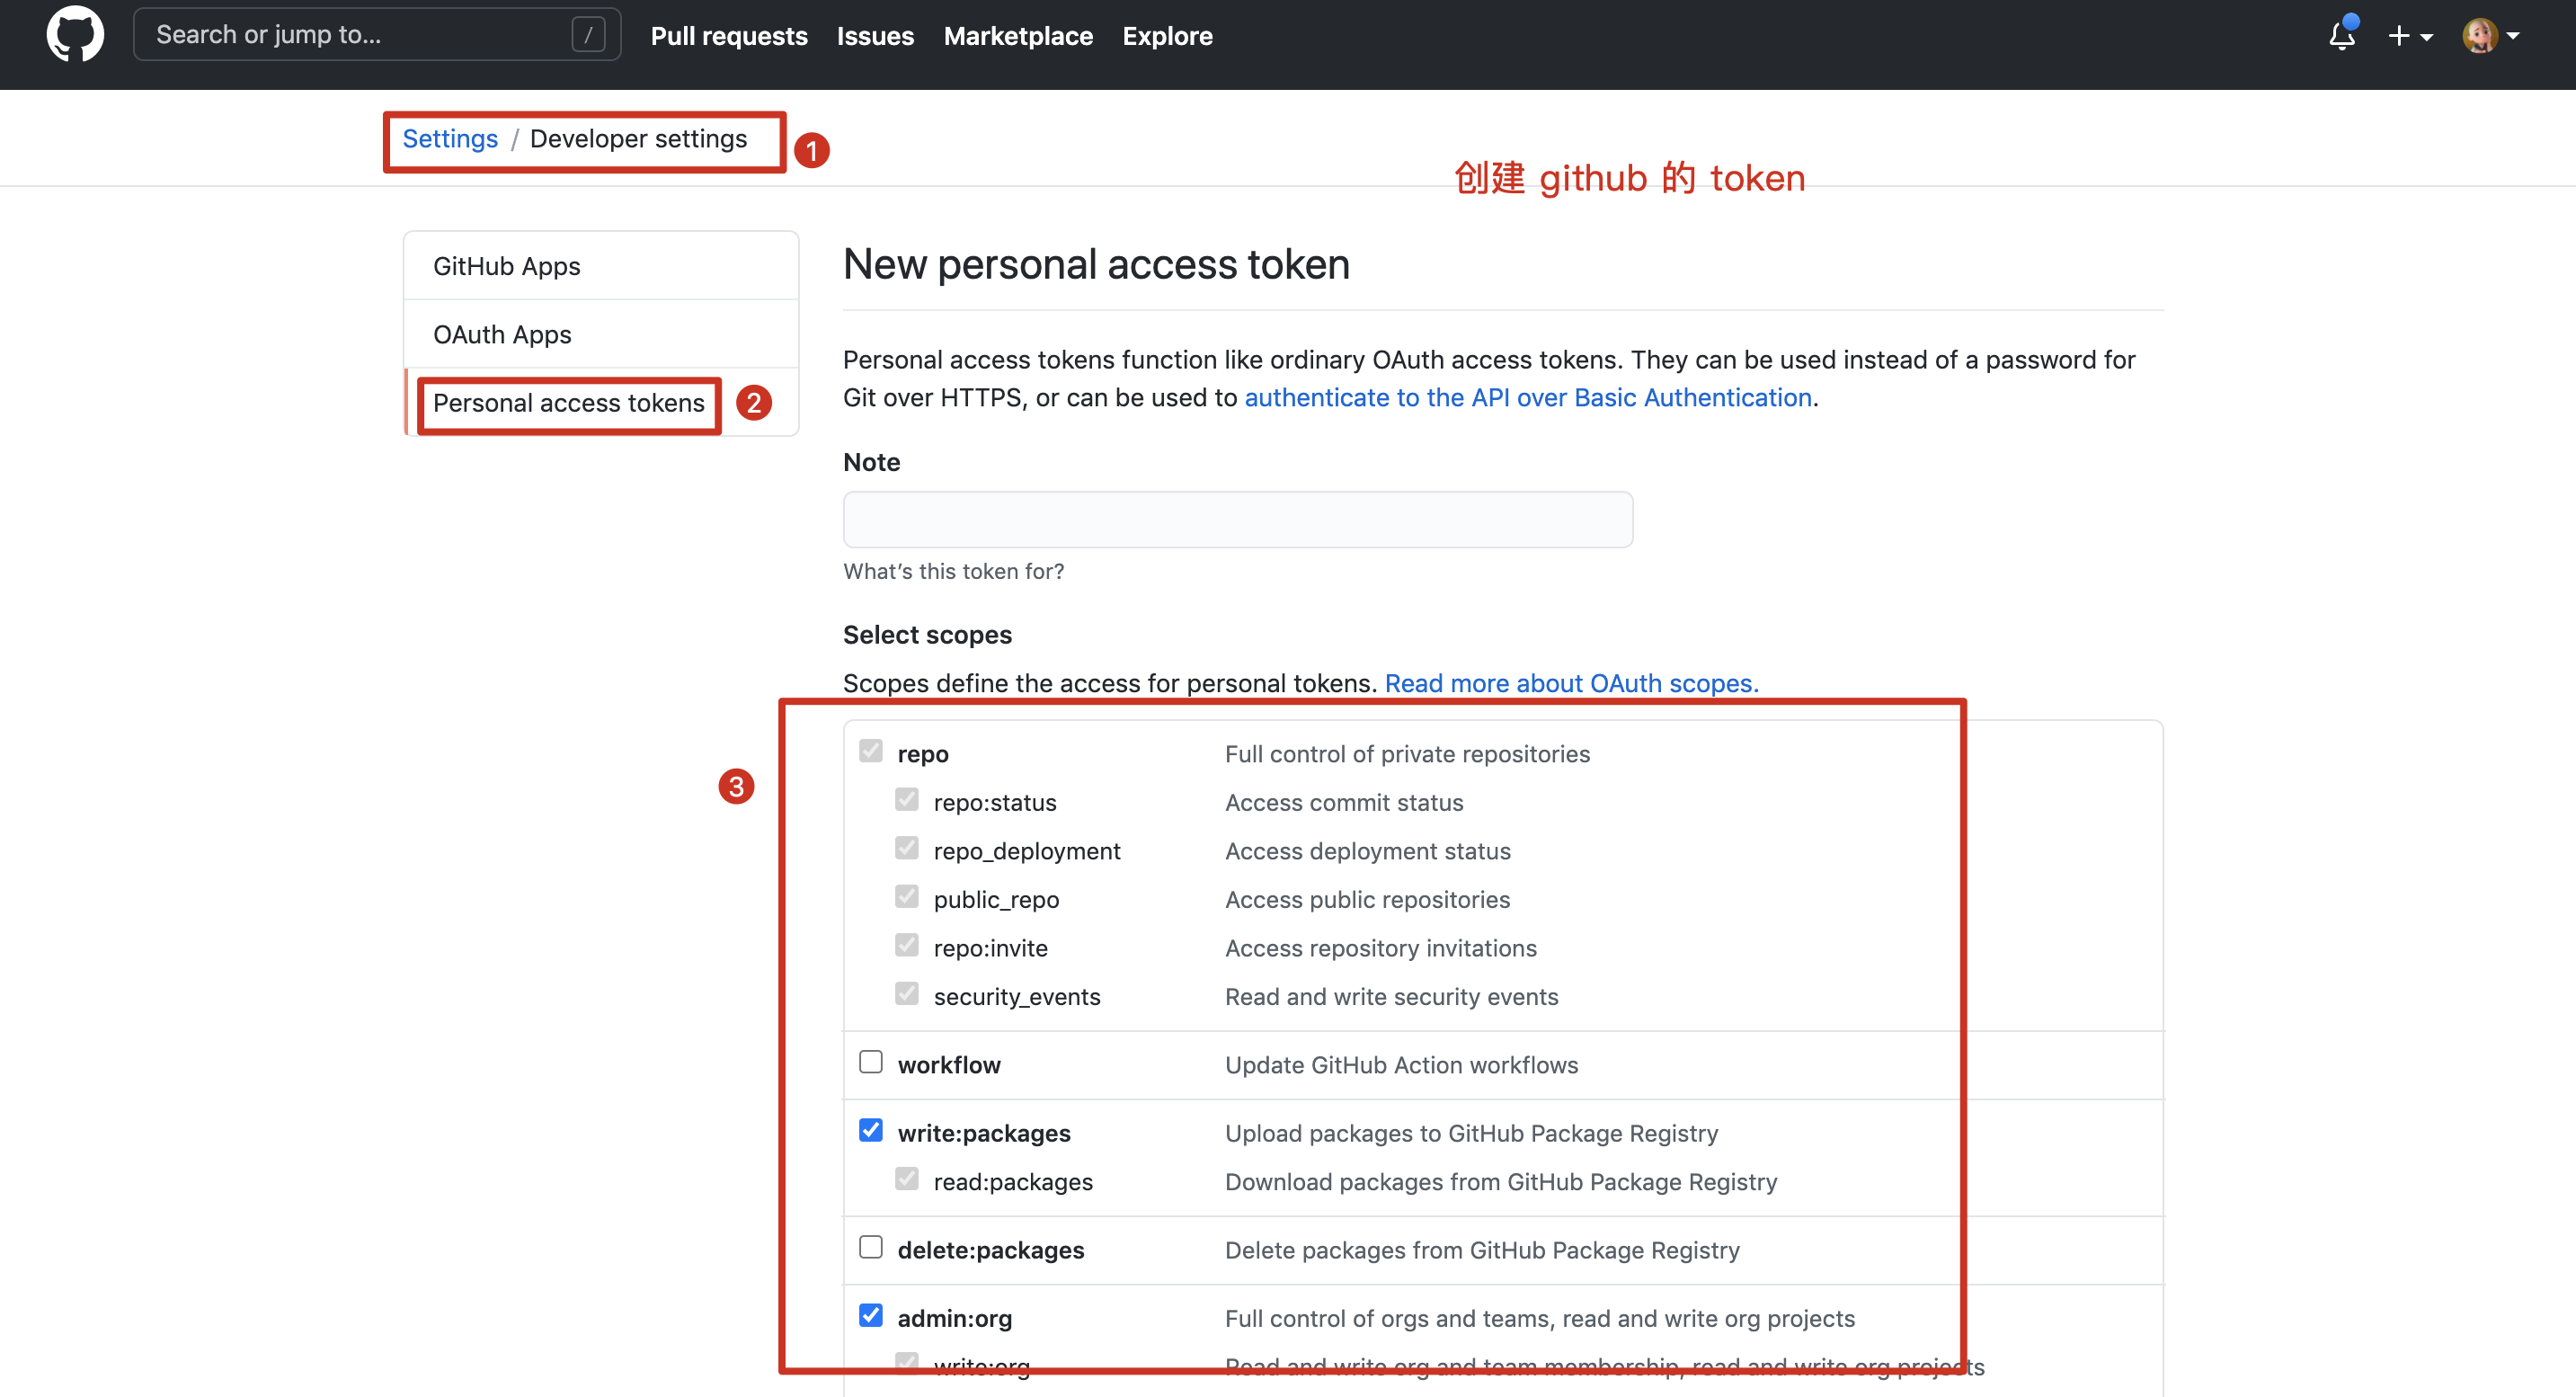
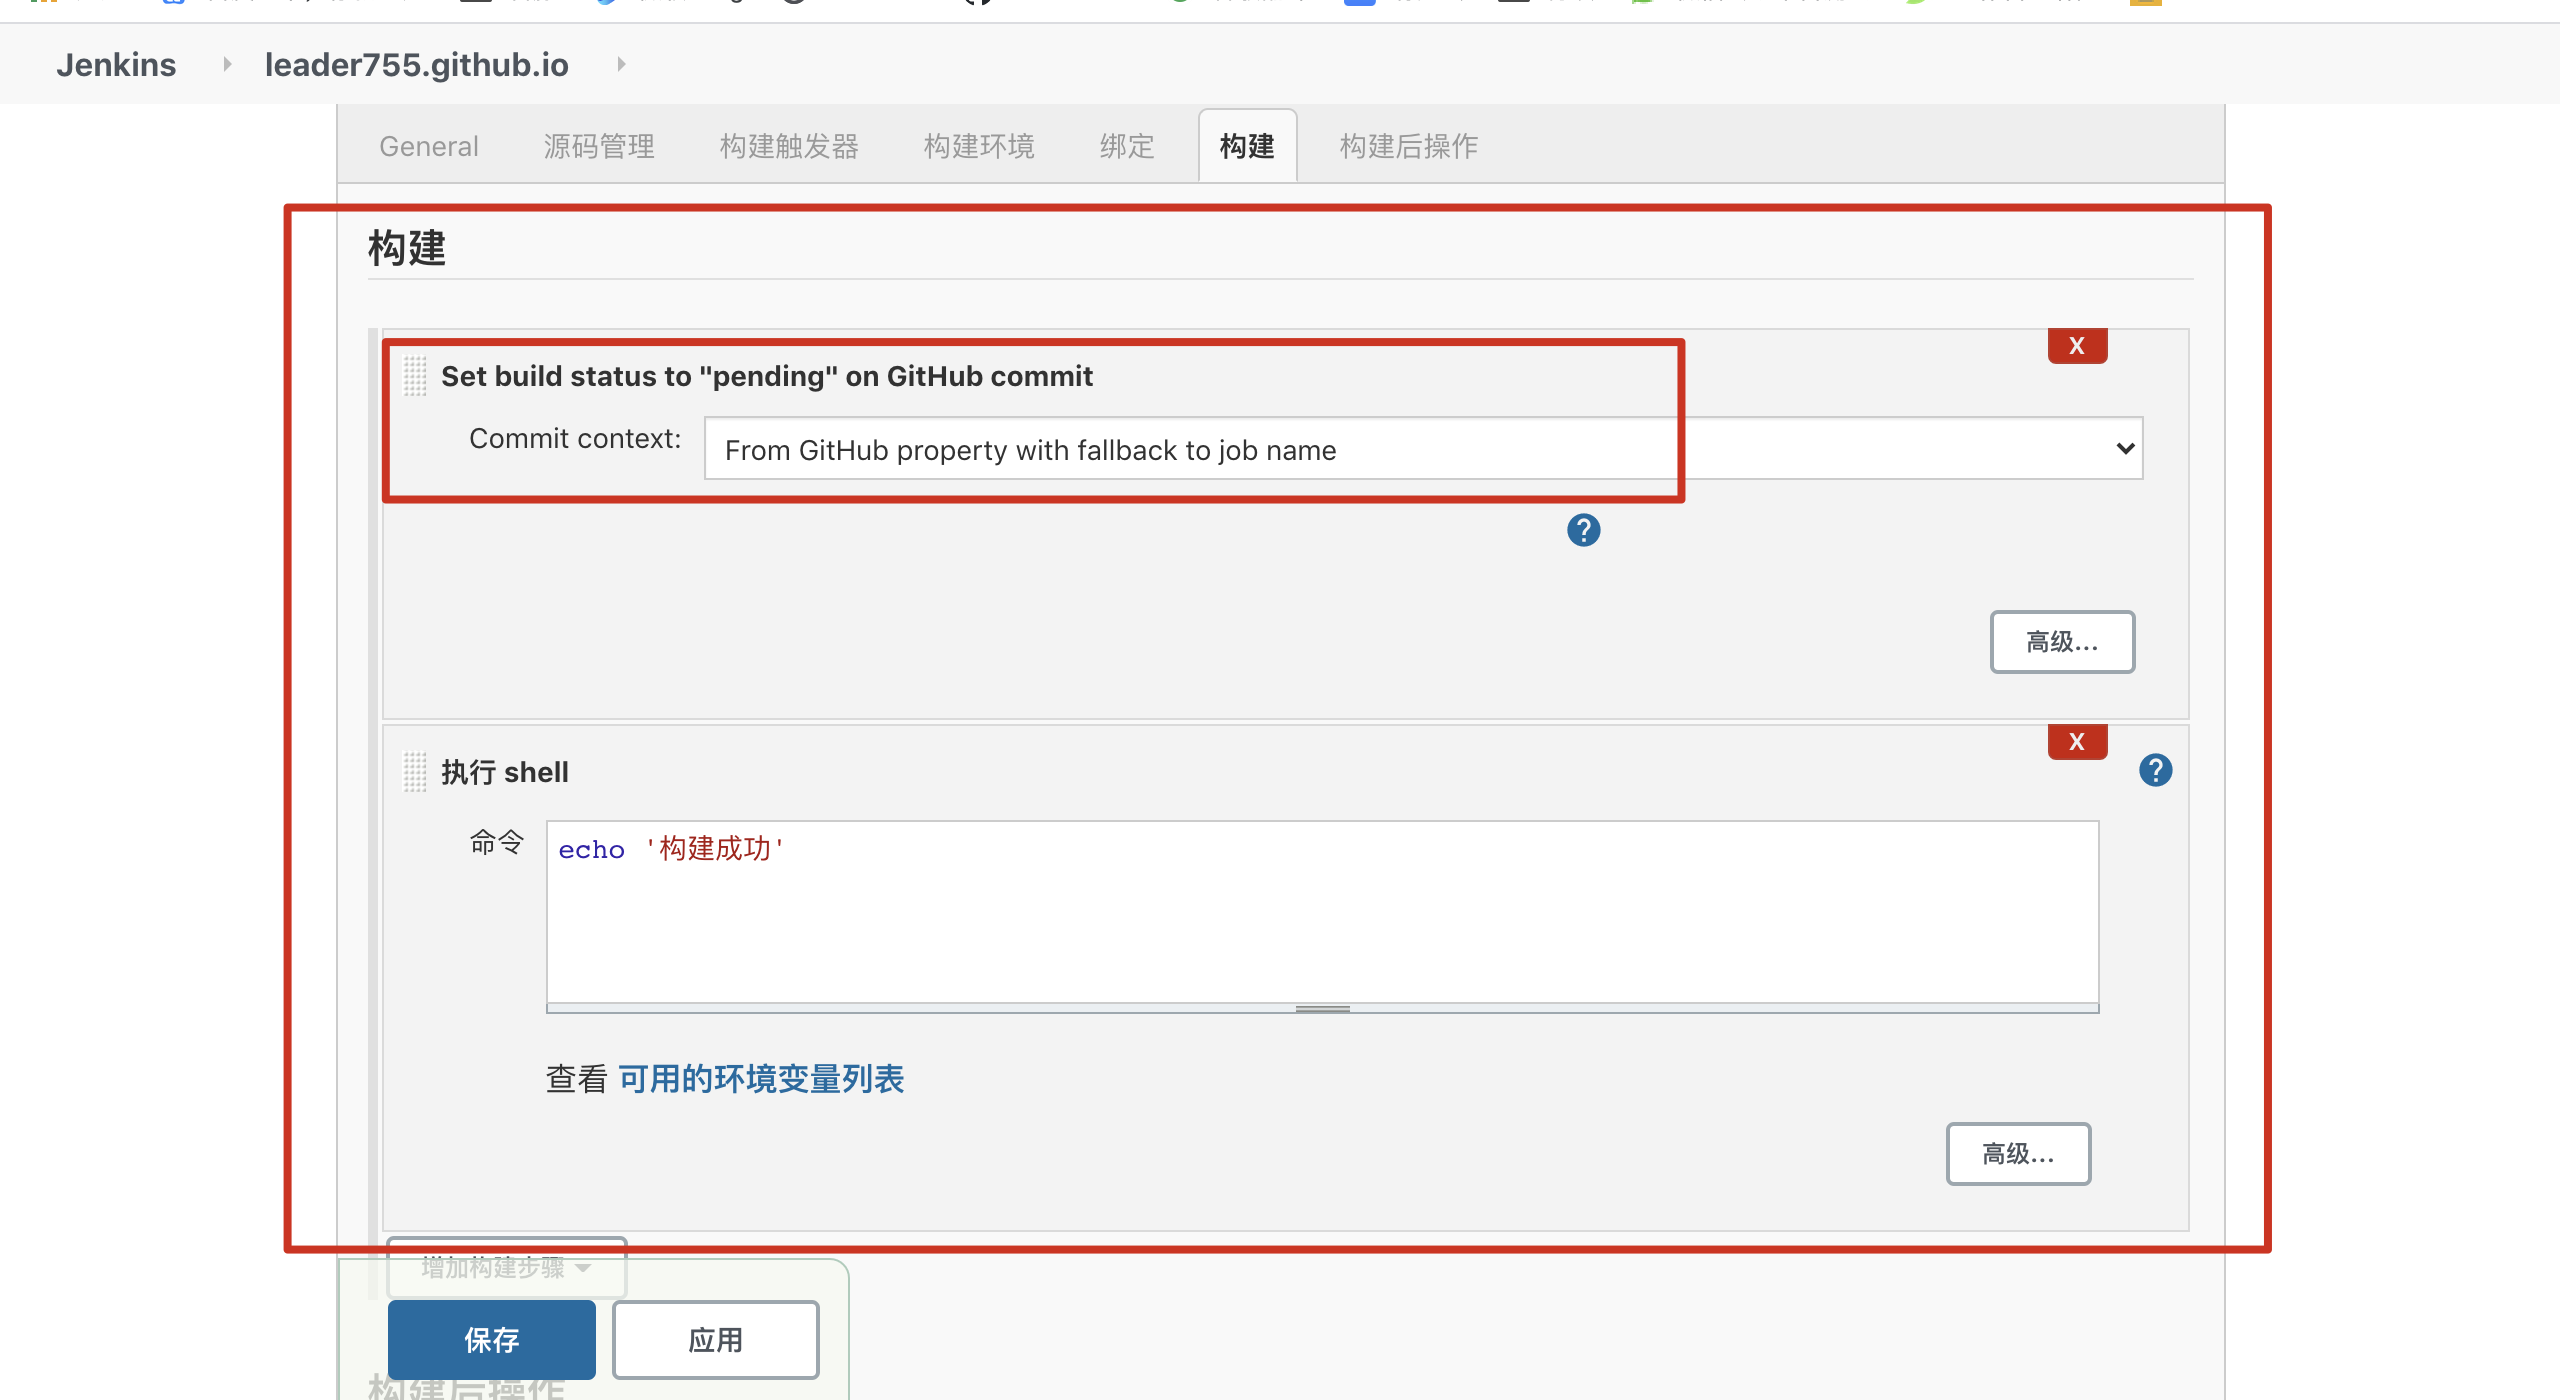
5>设置构建
##
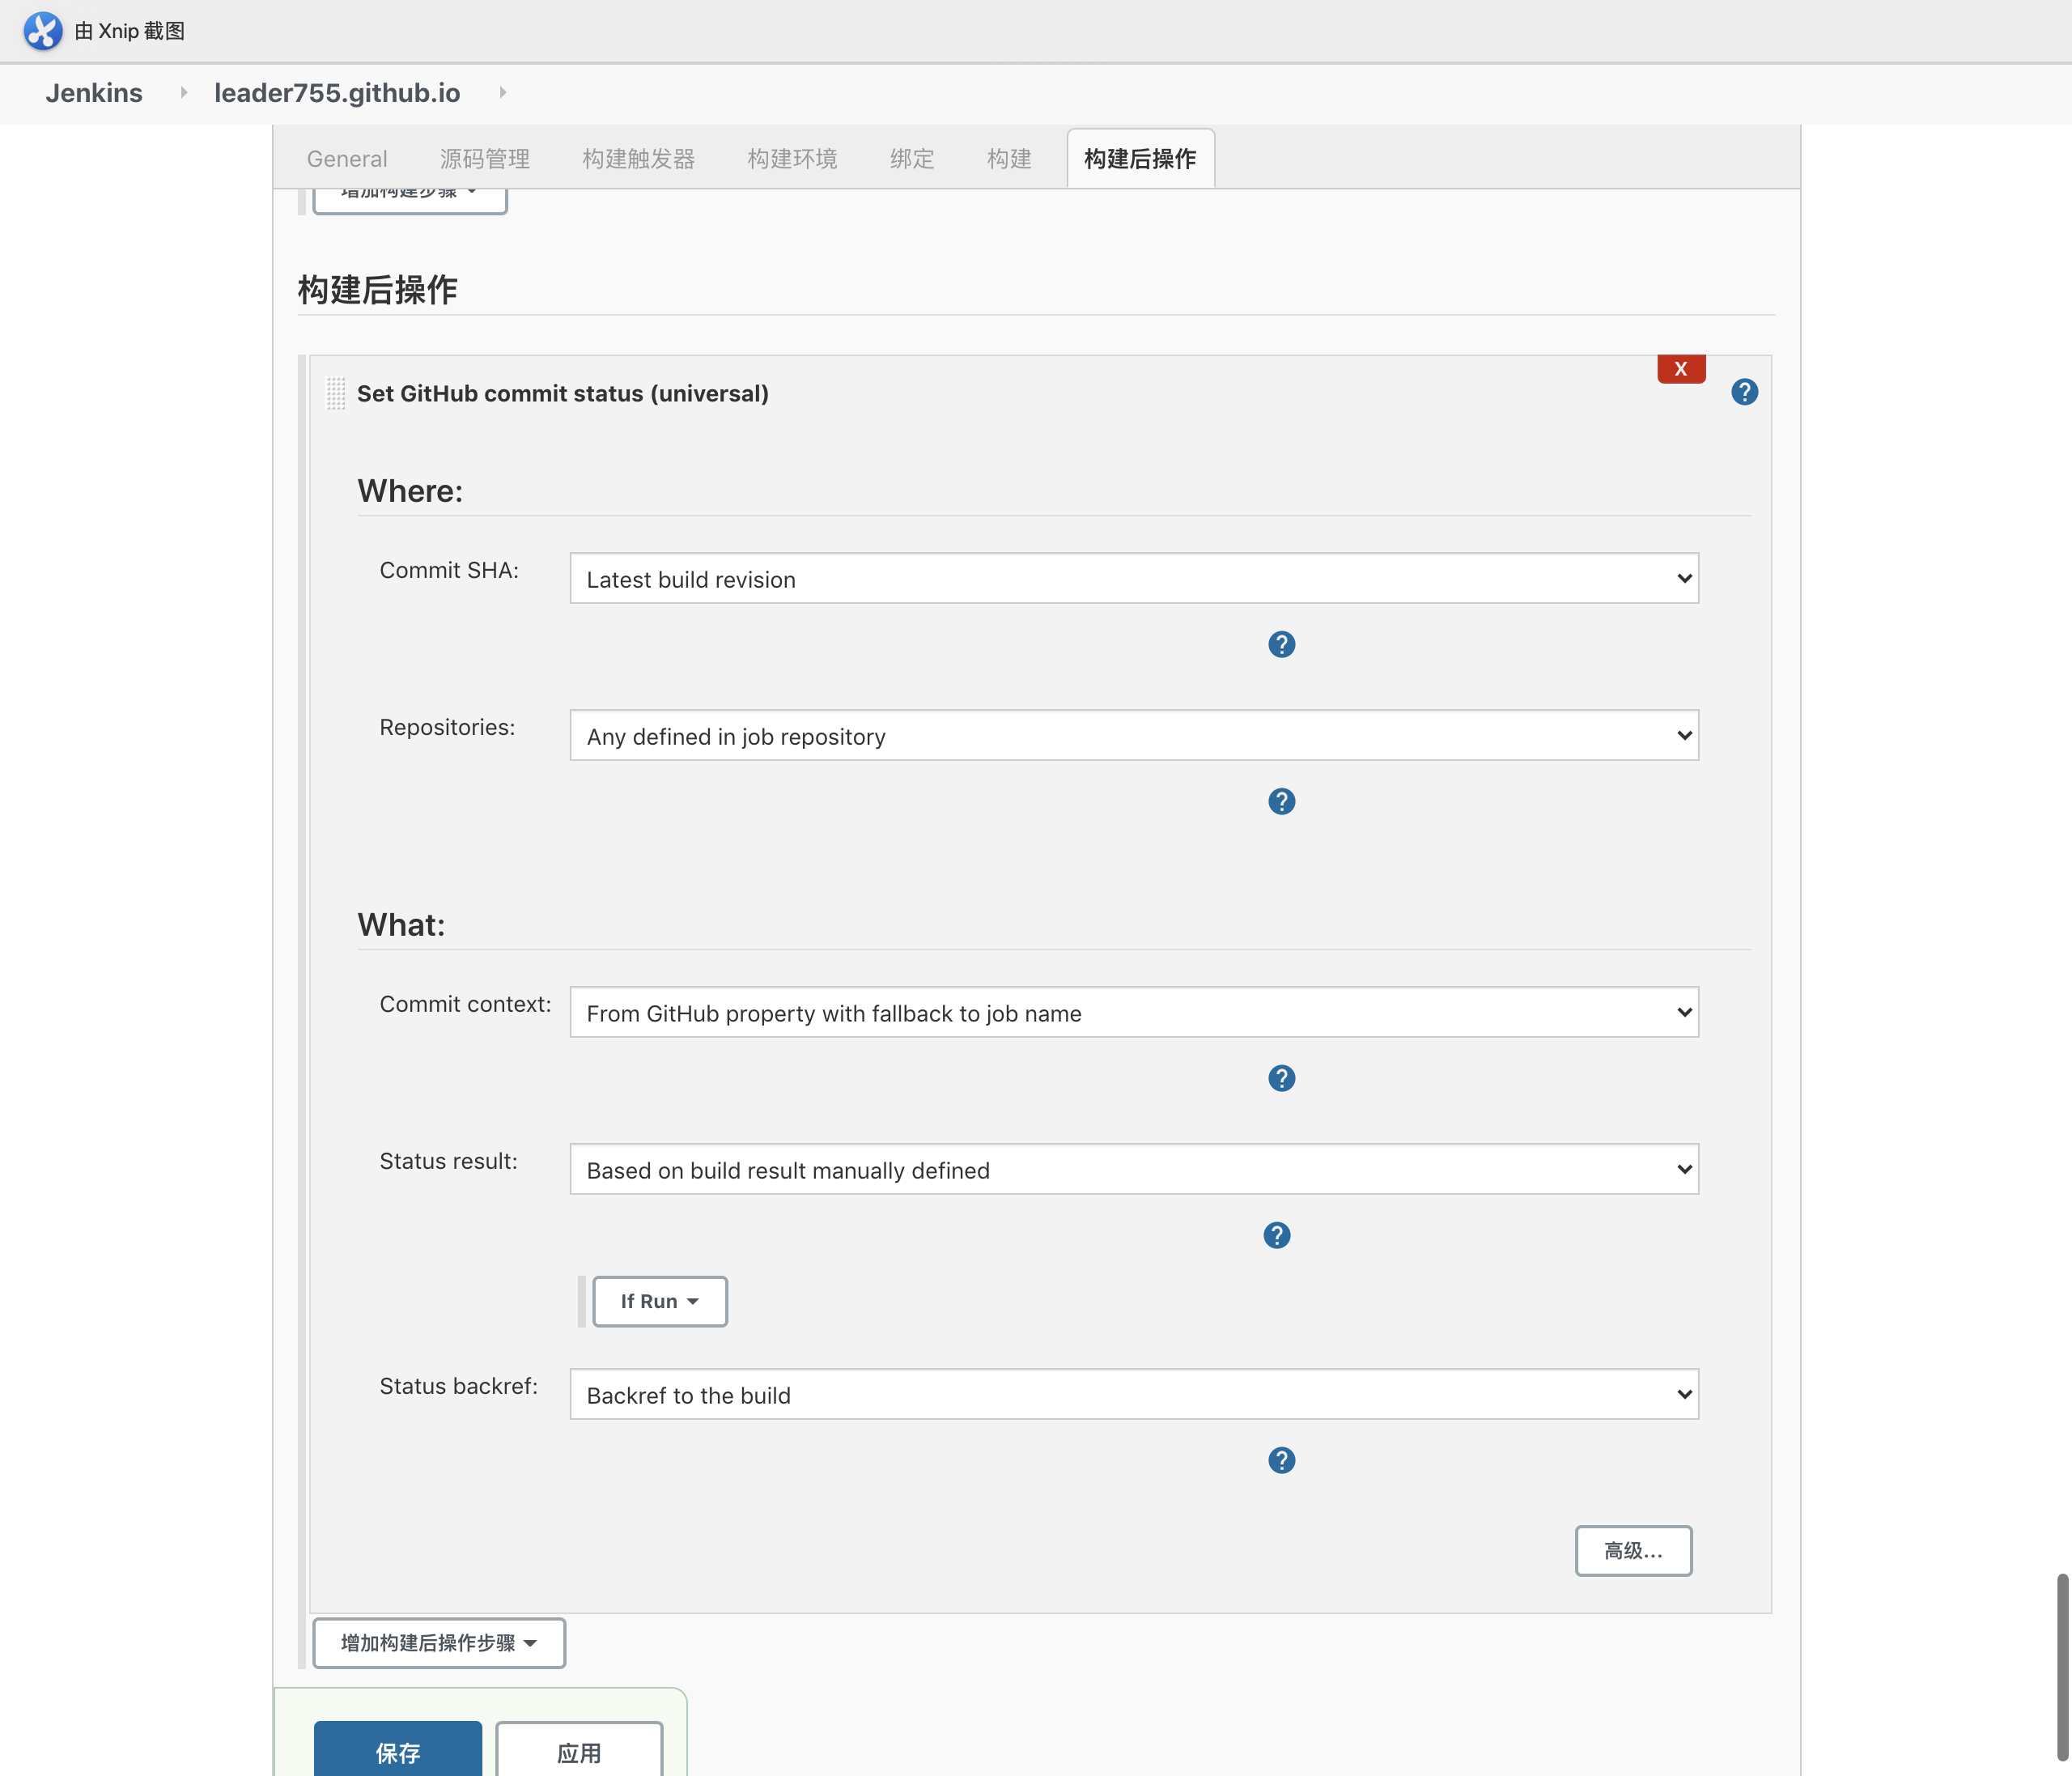
6>设置构建后的操作
7>设置超时的处理
解决 jenkins git timeout,设置时间为 60 分钟。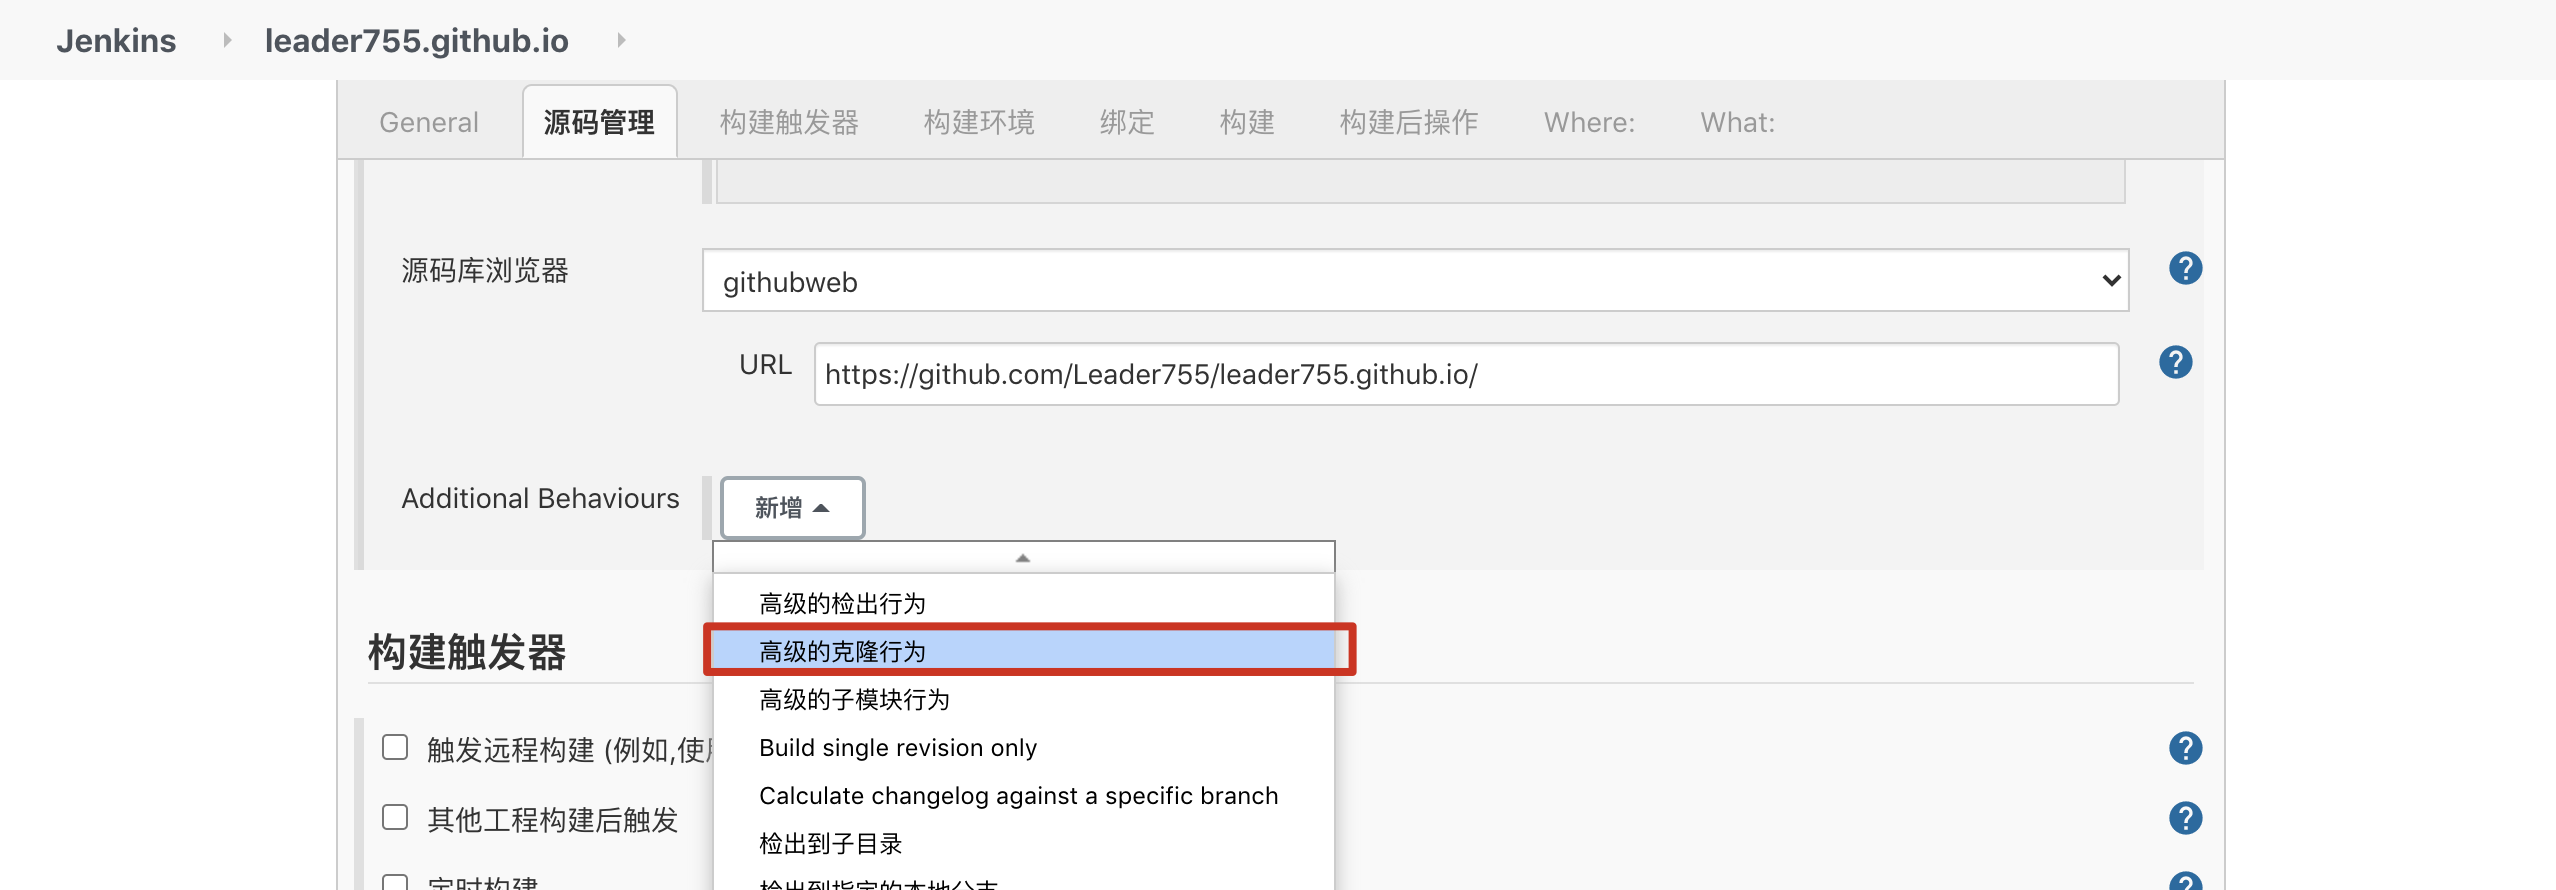

8>其他的构建方式
gitee 的利用 jenkins 构建,详细请查看[《gitee 的 jenkin 的自动化部署》](https://www.yuque.com/docs/share/0b157b88-5724-4608-a727-2be4f5fe5fd5?# 《gitee 的 jenkin 的自动化部署》)